
The decorations are the most magical touch to any Harry Potter party. But buying licensed merchandise from the Wizarding World can be exceptionally expensive! Plus, some of the most noteworthy items from the books and movies aren’t available for purchase. That’s why it helps to get crafty and DIY your way to a magical event.
DIY Harry Potter Party Decorations
In this blog post I explain all of the decorations I put together for our own party, like the portrait hall, broomsticks, floating candles, and more. In this blog post I give a detailed tutorial about how to create your own potion bottles and ingredients.
For this blog post, I want to focus on one more element of the decorations that really helped set the scene for Hogwarts: magic textbooks! Here is my step by step guide for how to make Hogwarts textbooks easily and elegantly.
How to Make Hogwarts Textbooks
Step 1: Gather your supplies.
You’ll need 9 inch butcher paper (you can find it at stores like Home Depot or Lowes), colorful printer paper or scrapbook paper, ideally a nice paper cutter (though scissors will work fine in a pinch), and double sided photo glue squares used in scrapbooking (you can find those at craft stores like Hobby Lobby or Micahel’s).
You’ll also need thick hardback books to wrap your book jackets around temporarily. I used titles I already had, like the Eragon series because those are nice and long. Dictionaries, textbooks, or the actual Harry Potter books would all be great candidates.
Step 2: Choose which textbooks you want to create.
This is an important step, because it determines how many hardback books you need to gather up, and how many convers you’ll need to design. You can find a comprehensive list of all the textbooks mentioned in the Harry Potter universe here.
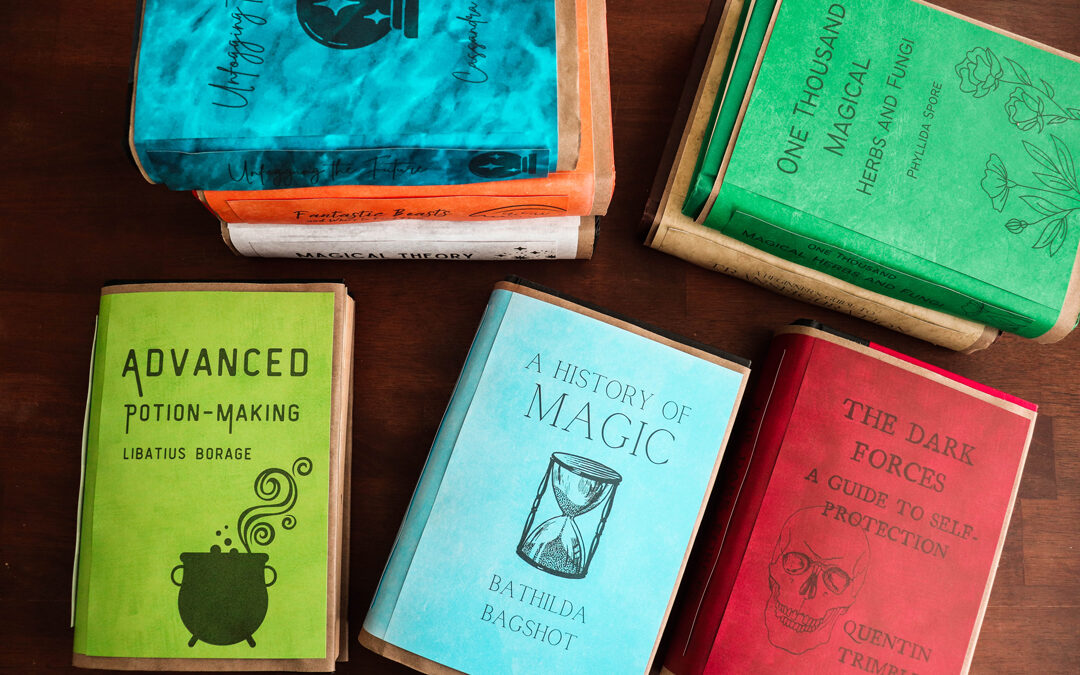
These are the ones I decided to recreate:
A Beginner’s Guide to Transfiguration by Emeric Switch
Magical Theory by Adalbert Waffling
The Dark Forces: A Guide to Self Protection by Quentin Trimble
A History of Magic by Bathilda Bagshot
Advanced Potion-Making by Libatius Borage
One Thousand Magical Herbs and Fungi by Phyllida Spore
Unfogging the Future by Cassandra Vablatskye
Fantastic Beasts and Where to Find Them by Newt Scamander
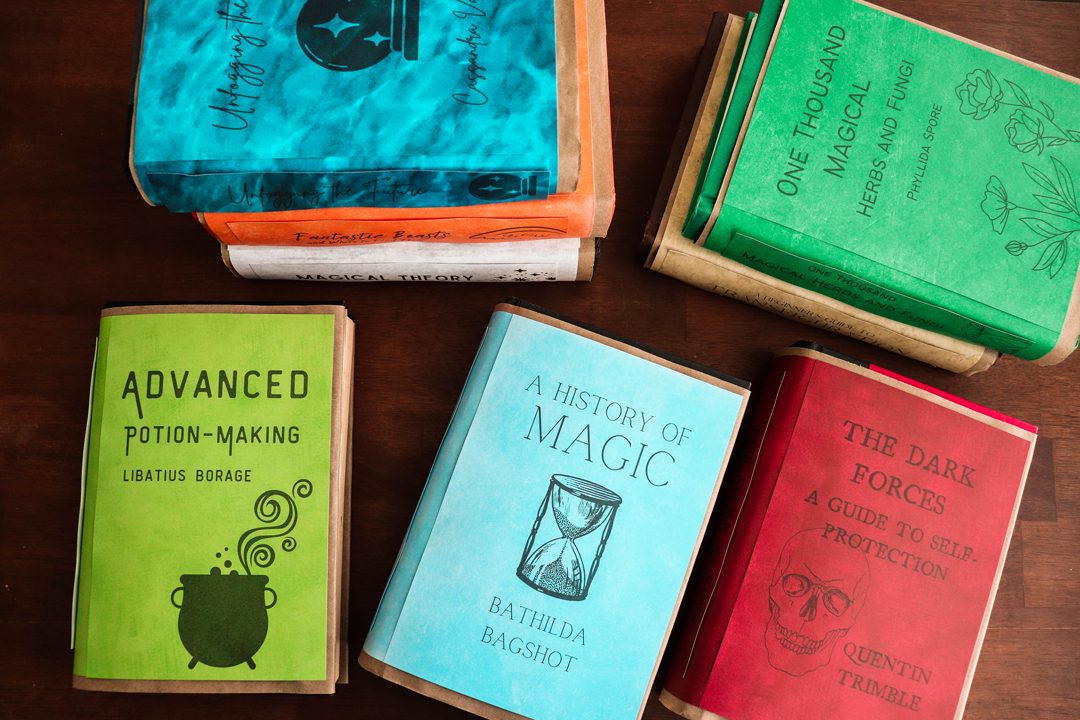
Step 4: Design your textbook covers.
I used a free website called Canva to do this, just like I did with our Hogwarts letter invitations. I chose fonts that had an antique, bookish look and added simple illustrations that represented each subject. You can do the same thing in a Word document, but Canva is a whole lot easier to use. Make your dimensions about 5.5 inches wide and 8.5 inches tall. That way, your covers will be the same height as the short edge of a regular piece of printer paper.
I also went the extra mile and designed spines for each of my textbooks. Simply flip your text to a 90-degree angle, and you can cut out a thin piece of paper with the design on it to tape over your spine later. I made my spines about 8 inches wide and 1.5 inches tall.
Step 3: Cut your butcher paper.
Once you’ve determined how many textbooks you want to make and you have your cover designs ready to go, you’ll need to create the base of the book jacket. Unroll your butcher paper and wrap it around the outside of your thickest hardback book, starting inside the front flap and ending inside the back flap just like a real book jacket. Mark to measure the length of paper you’ll need. Cut your first piece of butcher paper, then use its length as a guide to cut all of the rest of your pieces.
Step 4: Fold your butcher paper.
When you have each of your book jackets cut to the correct length, carefully fold the butcher paper around the outside edges of each book to keep it in place. Again, it should look just like the regular book jackets normally protecting the outside of your hardbacks.
You can optionally secure the butcher paper in place with tape, but I found that I didn’t need to do that since I just left my books closed to display them. I didn’t want to put tape one the butcher paper because it will tear when removed, and I wanted to be able to reuse these book jackets again!
Step 5: Print and cut your covers and spines.
Remember the colorful printer paper or scrapbook paper from the supply list? That’s where your designs will go because it can run through your printer normally (whereas butcher paper would be way too thin). If you’re using 12×12 scrapbook paper, you’ll need to cut it down to 8.5×11 first so it can run through the printer. I found some great 8.5×11 paper in so many colors at Hobby Lobby, so I mainly used that to make my life easier.
When you print your cover designs, make sure you load your paper into the printer with the colorful side facing down. Otherwise, your text will end up printed on the plain white back of the paper. I learned that the hard way a couple of times!
After you print everything, use a ruler to measure the size of your original canva docs (5.5in by 8.5in) and cut out the covers and spines
Step 6: Attach your covers.
This is probably the trickiest part of this Harry Potter DIY, but it’s totally doable, I promise!
Attach your double sided photo glue squares to the corners and edges of a blank piece of 8.5×11 paper. Turn the paper to a horizontal position. Lay the 8.5-inch edge of the paper carefully along the edge of the back cover of one of the butcher paper covered hardback books. Line it up straight as best you can, but don’t beat yourself up if it isn’t perfect. Nobody will notice!
Carefully fold the printer paper over the outside of your hardback book, adding a few more sticky photo squares along the middle of the spine. The piece of 11-inch long paper won’t reach all the way to the front edge of your book, but that’s ok. Your 5.5 x 8.5 inch cover will lay on top on the front. Attach that next, lining it up with the front edge of your hardback book. If you made spines, attach those last. Repeat for each of your textbooks until you are finished.
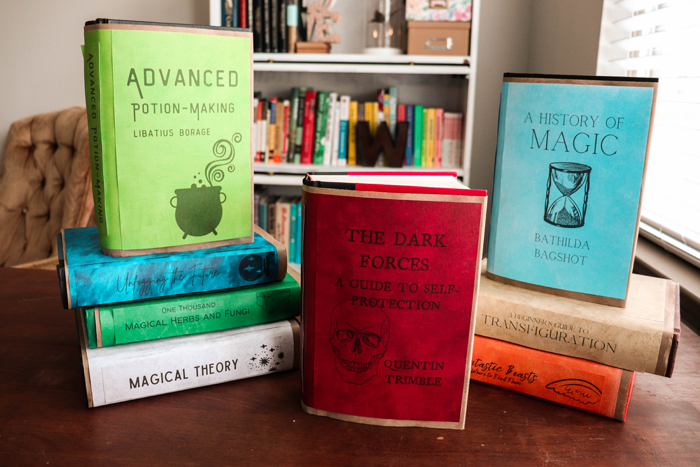
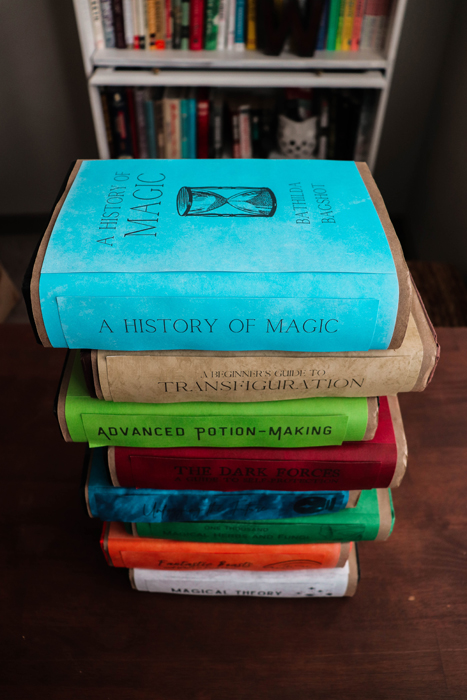
Step 7: Board the Hogwarts Express!
Your Hogwarts textbooks are done! Now you have all the school supplies you need for a new semester at the school of witchcraft and wizardry.
More Harry Potter Party Ideas
If you are hosting your own Harry Potter party, make sure you check out these ideas for food to serve and games to play. To all of my fellow Potter fans: mischief managed.
Harry Potter Party Decorations
FOLLOW ME